Hairpin Leg DIY: Build Your Own Custom Coffee Table
A comprehensive guide to designing and assembling a unique coffee table using hairpin legs. From material selection to final assembly, create a piece that perfectly fits your space and style.
Start Your DIY ProjectWhy Choose Hairpin Legs for Your Coffee Table?
Hairpin legs have become a favorite among DIY enthusiasts and interior designers alike. Their minimalist, mid-century modern aesthetic adds a touch of elegance and industrial charm to any living space. With a hairpin leg DIY project, you can build a custom coffee table that not only saves money but also becomes a conversation piece.
Whether you prefer a rustic wooden slab or a sleek painted surface, hairpin legs complement a wide range of styles. They are sturdy, easy to install, and available in various heights and finishes. This guide will walk you through every step, from planning to the final polish.
Materials & Tools You'll Need
Before starting your hairpin leg DIY project, gather the following materials and tools. Having everything ready will make the process smooth and enjoyable.
Materials
- Tabletop: Choose from solid wood (oak, walnut, pine), plywood, or even a reclaimed door or slab. Size depends on your preference and available space.
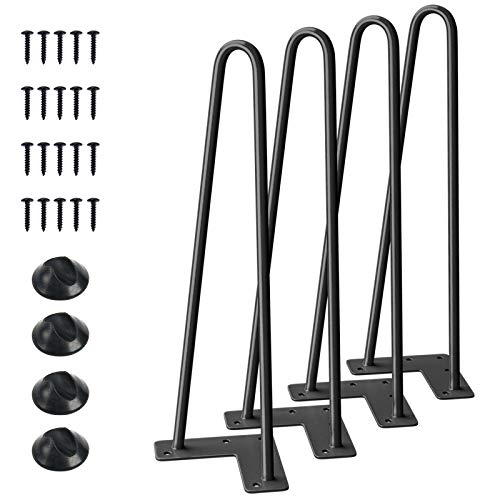
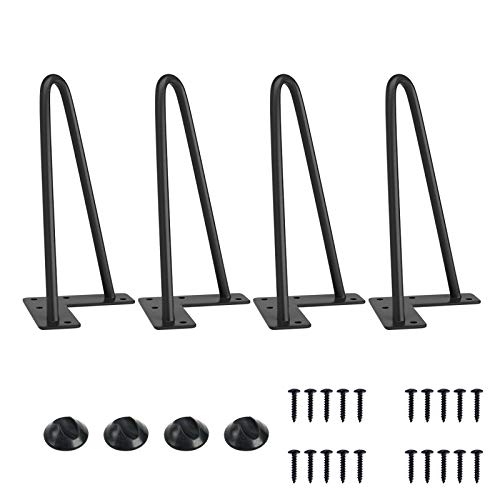
- Hairpin Legs: Select the height and finish (black, brass, silver) that matches your design. Standard heights range from 16 to 28 inches.
- Mounting Screws: Usually included with hairpin legs. Ensure they are appropriate for your tabletop thickness.
- Wood Finish: Stain, paint, or sealant to protect and enhance your tabletop.
- Sandpaper: Various grits (120, 220) for smoothing the surface.
Tools
If you're new to DIY, don't worry—this project is beginner-friendly. For more ideas on table styles, check out our Table Styles guide for inspiration.
Step-by-Step Hairpin Leg DIY Guide
Follow these steps to build your own coffee table. Each step includes tips to ensure a professional-looking result.
Step 1: Choose & Prepare Your Tabletop
Select a tabletop material that fits your style and budget. For a rustic look, consider a live-edge wood slab. For a modern feel, a smooth plywood or MDF board works well. Sand the surface with 120-grit sandpaper, then 220-grit for a smooth finish. Wipe clean with a tack cloth.
Step 2: Apply Finish
Apply your chosen stain, paint, or sealant. Follow the manufacturer's instructions for drying time. For a natural look, use a clear polyurethane or tung oil. Let it cure completely before moving to the next step.
Step 3: Position the Hairpin Legs
Flip the tabletop over. Place the hairpin legs at each corner, ensuring they are evenly spaced and aligned. For larger tabletops, consider adding a fifth leg in the center for extra support. Mark the screw holes with a pencil.
Step 4: Pre-Drill Pilot Holes
Using a drill bit slightly smaller than your screws, pre-drill pilot holes at the marked spots. This prevents the wood from splitting and makes screw insertion easier. Be careful not to drill through the top.
Step 5: Attach the Legs
Align the hairpin legs with the pilot holes and secure them with the provided screws. Tighten firmly but avoid over-tightening, which could strip the wood. Use a level to ensure the table sits flat.
Step 6: Final Touches
Turn the table upright and place it on a level surface. Check for wobbles and adjust if necessary. Add felt pads to the bottom of the legs to protect your floors. Your custom coffee table is ready to style!
Design & Styling Ideas for Your Hairpin Leg Table
Once your table is built, the fun continues with styling. Hairpin legs pair beautifully with various decor themes. Here are some ideas to get you started:
- Minimalist Look: Pair a white or light wood top with black hairpin legs. Keep the decor simple with a tray and a few books.
- Industrial Style: Use a reclaimed wood top with raw steel legs. Add a metal lamp and concrete accessories.
- Scandinavian Vibe: Choose a pale wood top and brass legs. Style with a ceramic vase and a soft throw.
- Boho Chic: Opt for a round tabletop with gold legs. Layer with a woven runner, candles, and plants.
For more inspiration, explore our guides on Styling & Decor and Decor Ideas. You can also find tips on Rug Placement to complete your living room setup.
Caring for Your Hairpin Leg Coffee Table
With proper care, your DIY coffee table will last for years. Here are some maintenance tips:
- Dust regularly with a soft, dry cloth to prevent buildup.
- Use coasters for drinks to avoid water rings. Learn more in our Coaster Guide.
- Clean spills immediately with a damp cloth and mild soap.
- Tighten leg screws periodically to ensure stability.
- Reapply sealant every year or two to protect the wood surface.
If your tabletop gets scratched, check our Fix Scratches guide for easy repair methods.
Ready to Build Your Own?
Gather your materials, follow this guide, and create a coffee table that's uniquely yours. Browse our recommended products below to find the perfect hairpin legs and accessories for your project.
Shop Hairpin Legs & Supplies